
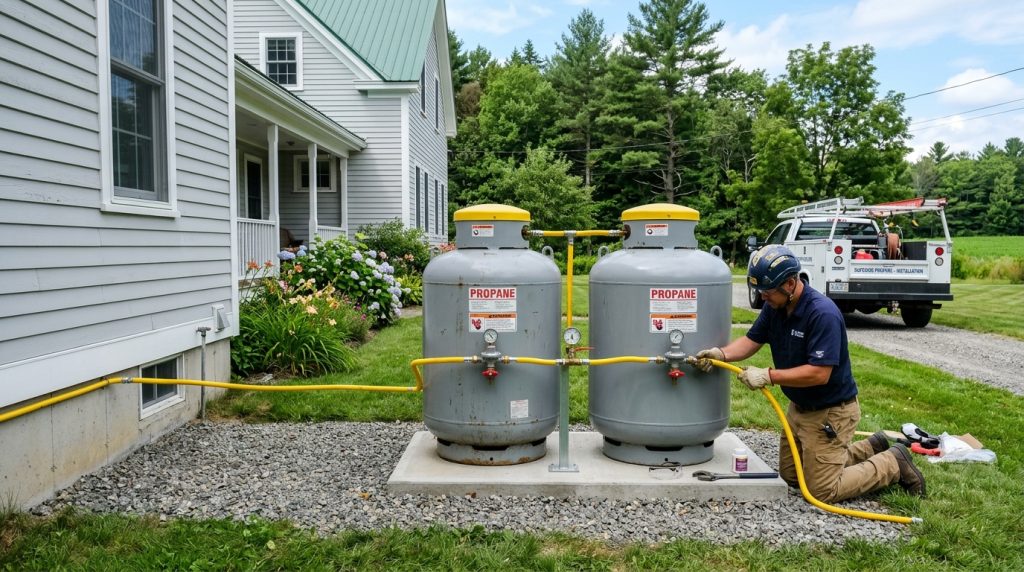
Preparing a site for a propane tank installation involves more than choosing a convenient spot. Ground conditions, local regulations, delivery access and the tank’s distance from buildings or other features all affect whether the installation can proceed safely and reliably.
Site Assessment for Propane Tank Placement
The first step is selecting a location that accommodates the tank while meeting the applicable setback requirements. These distances can vary according to tank capacity, tank design, nearby buildings, property lines, openings and ignition sources. The propane supplier and local fire or building authority should confirm the rules before the location is finalized.
Assess the site for slope, flood exposure, overhead obstructions and the route a delivery vehicle will use. A location that appears convenient from the house may be unsuitable if a truck cannot approach safely or if seasonal water flow could undermine the base. Marking the proposed tank position on a site plan makes it easier for installers and officials to review clearances before work starts.
Once a candidate location has been identified, checking the ground itself helps determine what preparation will be needed.
Soil Testing and Ground Stability
Soil testing can help establish whether the ground will support the tank and its foundation without shifting or settling. Soil composition, compaction and moisture conditions all matter; loose fill or persistently wet ground may require additional preparation. A qualified installer can advise whether professional testing is appropriate for the site.
Stable support is especially important because uneven settlement can place stress on the tank, piping or connections. The intended base should be firm, properly compacted and appropriate for the tank manufacturer’s specifications. Where local conditions call for it, a level foundation may consist of a properly prepared bearing surface or a concrete pad; the required design depends on the installation and local code.
With ground conditions understood, the next task is preparing the work area without disturbing buried services.
Utility Marking and Excavation Planning
Before any excavation, underground utilities must be identified and marked through the appropriate local notification service. Buried electric, gas, water, sewer and communications lines may not follow visible features on the property, so guessing their location is unsafe. Markings should be reviewed with the excavation contractor, and digging should follow the required clearance procedures.
The scope of excavation depends on the tank arrangement and foundation plan. Work may involve removing unsuitable material, grading the area or preparing a base, but the installer’s specifications should guide the process. Avoid digging beyond the planned footprint: unnecessary disturbance can weaken nearby ground and complicate restoration.
These checks make the physical work more predictable; permits and site access determine whether it can proceed smoothly.
Permit Compliance and Access Clearance
Permit compliance may involve building, fire-safety, zoning or environmental requirements, depending on the jurisdiction and project. Confirm which approvals and inspections are required before construction, and keep the approved site plan available for the installation team. Requirements can differ between municipalities, so guidance from another property or region may not apply.
Access clearance should account for the delivery vehicle, lifting equipment and technicians who will position and service the tank. The route needs adequate width and overhead clearance, with firm ground that can support vehicle traffic. Gates, branches, parked vehicles and soft shoulders can all obstruct installation or future refills.
A practical pre-work review can keep the main checks visible to everyone involved:
- Confirm tank location and applicable setback requirements with the supplier and local authority.
- Arrange utility marking and review all markings before excavation.
- Verify the foundation design, ground stability and drainage plan.
- Check permits, inspection stages and delivery access clearance.
Drainage Planning and Foundation Preparation
Drainage planning helps keep runoff from collecting around the tank or washing away supporting soil. The ground should direct water away from the foundation while preserving stable access for service vehicles. Avoid placing the tank where roof runoff, downspouts or natural channels routinely create erosion or standing water.
Before the tank arrives, the installation area should be cleared and prepared to the approved plan. The base must be level and capable of supporting the equipment; a concrete pad is not automatically required for every installation. Its use, dimensions and reinforcement, when applicable, should follow manufacturer instructions and local requirements rather than assumption.
Final coordination ties these preparations together. The installer should verify the location, foundation, clearances and inspection status before setting the tank, then check that connections and surrounding access meet the approved design. Careful preparation turns a series of separate checks into one safer, more dependable installation process.


