


For some painting jobs, airless painting is a more advantageous alternative to the traditional roller and brush painting technique. The method is much faster (between 50 and 70% time-saving), efficient, and leaves no traces.
To obtain a good result, airless painting requires careful preparation and precise implementation. It is, therefore, essential to pay full attention to these two parameters.
Here is how to use an airless paint sprayer.
First, let’s take a look at what is airless painting?
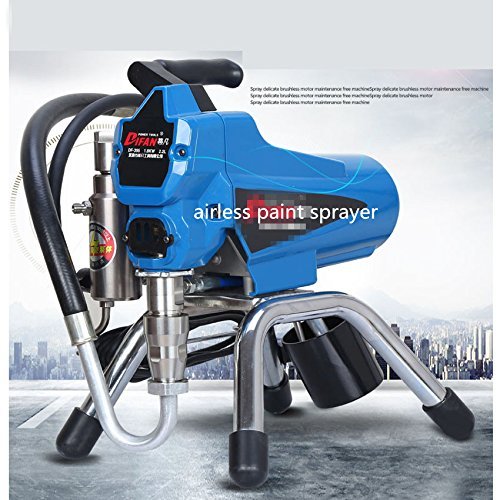
The airless is a high-tech and airless high-pressure gun that sprays paint into fine particles using a piston pump. You will find devices for similar use under the names paint spray gun, paint station, or compressor gun.
Two types of media significantly benefit from this process:
– objects and furniture of complex shapes, difficult to handle (ironwork, chairs…) or other furnishing elements with openwork surfaces (shutters, gates…);
– interior and exterior wall surfaces and ceilings, preferably and especially when the space to be painted is empty of furniture.
Good to know: depending on your work’s nature, you will have to choose the adapted material for purchase and rent. There are machines of all capacities to paint from the smallest to the most extensive surfaces. Count about $100 per day in the rental for a medium capacity airless for an apartment’s interior, and between $500 and $800 for purchasing the same type of new machine.
1. Protect your workspace before painting with an airless sprayer
Airless painting produces a slight cloud when you spray paint, so it is essential to protect the space around the surface being worked on:
If it is furniture or objects, plan a sufficiently large tarpaulin on which you will come to position your support to be painted.
In the case of a housing-type space, protect, with tarpaulins and painter’s masking tape that you can find at paint dealers, all the parts that must not be painted or that you choose not to paint.
Tip: use tarpaulin for large areas to be protected (floors, walls, furniture, windows…), and cardboard that does not tear and covers well. Don’t forget to mask hinges, handles, switches, sockets, door frames, etc. with tape.
Important: as with all painting jobs, make sure you have a sound surface, previously prepared according to the quality of finish you are looking for, and free of dust.
This step represents more than 50% of the execution time for airless painting. Don’t worry about it, because the painting process will be rapid.
2. Give it a try
Preferably choose special airless paints or paints with a spray gun image. Otherwise, dilute your paint to about 5% (with water for waterborne paint, white spirit for glycerol paint). In all cases, mix it well with an electric mixer.
Adjust your airless settings (pressure, jet shape) following the manufacturer’s technical instructions supplied with the machine.
Make preliminary tests before you start painting:
If you observe a speckled effect, your paint is too thick; therefore, you can dilute it further.
If dripping appears, it is too liquid, then add undiluted paint to your bucket.
Important: protect yourself by wearing a coverall and paint mask. Wearing gloves is also recommended to spare the sensitive skin on your hands. Also, maintain some light air circulation in the work area to help disperse suspended paint particles.
3. Airless painting
You can paint an apartment of 200 m² and more in one day (or two for a two-coat application).
Start with the ceilings, then continue with the walls to avoid repercussions on your work.
Start painting from an angle and cover in a slow and regular back and forth movement with a width that allows you to accompany your gesture with the whole forearm and body (between 1 and 2 m). The gun should be about 20 cm from the support. Keep the jet perpendicular to your surface, always “bite” on 50% of the previous jet, and stop the projection at the end of each gesture to avoid an overload.
Then “cross” your paint, covering the surface you have just painted in the opposite direction (horizontal, then vertical, or vice versa).
This way, you can cover your entire wall or ceiling without neglecting the recessed corners and protruding edges.
Tip: use thin layers without overloading the paint, which could compromise a good result.
Proceed with cleaning the machine
If necessary, apply a second coat after drying, using the same procedure.
Finally, when the operation is finished, and the paint dries, remove the protections and gently peel off the scotches.
Important: after each coat of application, clean your airless immediately following the instructions in the device’s manual to maintain a clean power supply circuit and avoid clogging it.
Hope this guide would be of any help to you. Remember to share your experience in the comment section below.
One thought on “Painting With an Airless Sprayer”