


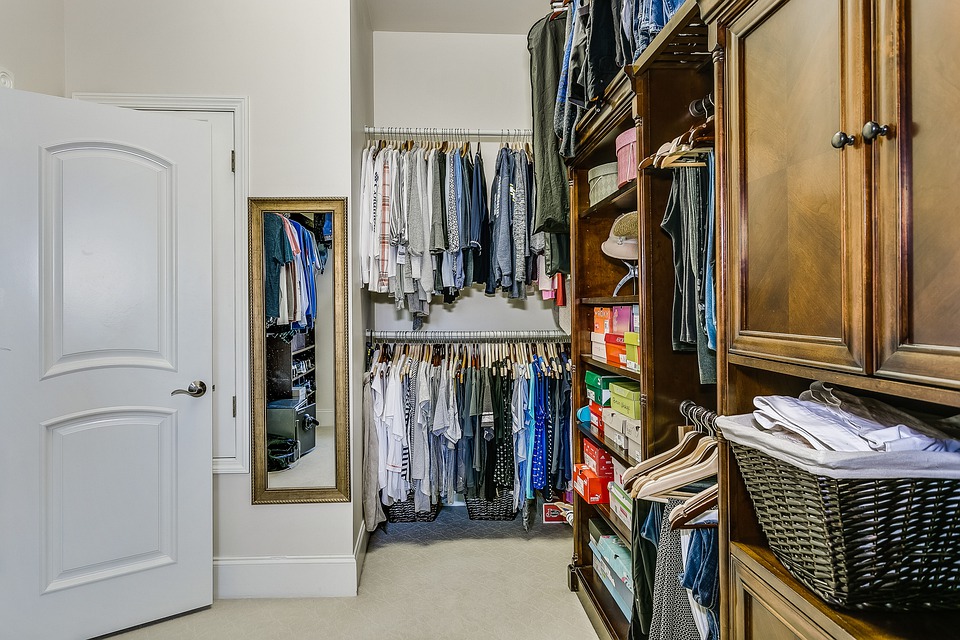
Often our wardrobes become a jumbled mess, where everything ends up being thrown away and mixed. Clothes, bags, or even shoes end up finding room by force. If you want to organize your wardrobe and don’t know where to start, keep reading.
Below we’ve gathered a few ideas to help you create your own clothing organizers. They are simple to make, and you can use materials that you probably have at home. Otherwise, it’s very easy to get some. The advantage is that you get to recycle items you no longer use and give them another chance. Still, you will also enjoy other benefits like sorting your belongings and promoting your creativity.
Having a neat and well-organized area makes you feel relaxed and saves you time. You can make organizers for each type of clothing and keep your wardrobe always tidy with various items. What’s more, from an aesthetic point of view, it will look much better.
1. Felt Organizers
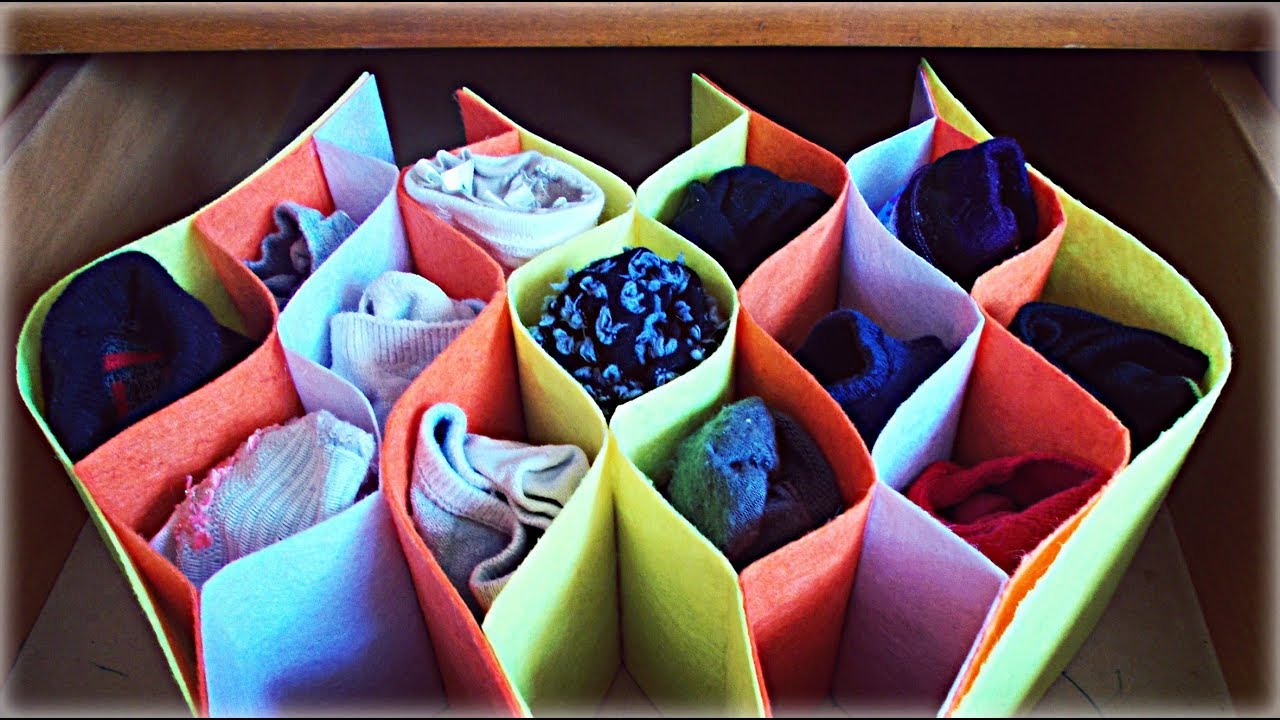
This type of organizer is specially designed to store small clothing items that are usually tucked away at the bottom of the drawer and forget that you even have them. They are, therefore, ideal for storing socks, underwear, and stockings.
Materials
10 felt rectangles (30 cm long X 10 cm high)
Silicone Gun
Directions
Take a rectangle and cut it into three equal parts of 10 cm each.
Mark these vertical lines with silicone
Place another felt rectangle on top. In this way, they will remain stuck to these two lines.
On the felt above, divide it again into three.
Apply the silicone.
Glue on another felt pen.
And so on, until the end.
How to Use?
Put the felt organizer in the drawer.
Put a garment in each hole.
2. Wooden Cabinet With Drawers
This organizer is slightly larger and is ideal when you have a free wall and need shelves to hang clothes hangers. With very few items, you can have a homemade, spacious wardrobe to your taste. It can also be adjusted to a child’s room by using kids’ patterns and drawings. Or it can be a more classic or vintage style if it is decorated in pastel colors. Its height and size can vary according to individual tastes and needs.
Materials
8 wooden drawers
A 1 meter wooden stick
Rings to hold
Sandpaper
Paint and brush
Directions
First of all, you polish the boxes inside and outside very well.
Then you can paint the boxes and the wooden stick in the color you prefer.
Stack the boxes in two groups of 4, with the opening facing forward.
And leave 80 cm of free space between them.
Place the rings on the top of the drawer that has been left above.
Pass the stick through the rings.
How to Use?
On the stick you can put the hangers.
In the drawers, you can put folded clothes, bags, or anything else you need to store.
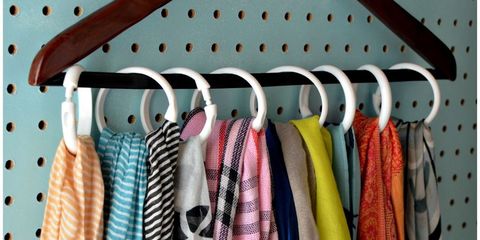
3. Organizers With Curtain Rings and Hangers
If you were looking for a way to organize your scarves and neckerchiefs, this will be perfect. And it will also help you save space and have all your clothes neat and visible.
Materials
1 hanger
8 rings for shower curtain
Directions
Simply take the rings and hook them onto the hanger.
Hang the hanger on the coat rack.
How to Use?
A scarf or handkerchief is placed per ring.
The rings are distributed along with the hanger.
With handy and straightforward materials, you can assemble beautiful organizers. They are used to keep clothes clean and better maintained and dress and decorate the room. Go ahead, make one, and tell us about your new organizer in the comments below.