


How to Varnish Wood
Contents
Focus on wood varnishes
Step 1: Prepare the wood to be varnished
Step 2: Apply the first coat of wood varnish
Step 3: Apply the next layers of varnish
Step 4: Maintain your varnished wood
In addition to protecting against scratches and stains, wood varnish has interesting aesthetic qualities: glossy and transparent, matte or satin. Depending on the type of finish chosen, it can enhance the nature of the wood or, when the wood has lost its shine over time, give it a new lease on life. To know how to varnish wood, follow the step-by-step explanations.
Focus on wood varnishes
There are many varnishes on the market. But it is possible to classify them, according to their composition, into 2 main categories.
Varnishes in the aqueous phase
They include varnishes known as “acrylic” (based on acrylic resin) and “aquaréthanes” (based on urethane resin), which are diluted and cleaned with water.
Advantages:
they are environmentally friendly;
they are odorless;
they do not yellow;
they dry quickly.
Disadvantages:
they sometimes dry too fast;
they are less resistant;
they are difficult to sand;
they are only suitable for interior use;
some can only be applied to light wood.
Note: the varnishes used to seal wood floors are water-based.
Varnishes in the solvent phase
These are marine varnishes (composed of polyurethane resins and an anti-UV agent) and polyurethane varnishes cleaned with white spirit.
Advantages:
They are very resistant;
They can be applied to all types of wood;
they give a glossy film;
they are easily sanded;
they can be used for exterior applications.
Disadvantages:
they are sometimes, depending on the desired result, difficult to apply;
they give off a very strong odor;
they dry slowly, even very slowly;
in time, they turn yellow.
Tip: depending on the type of varnish you use, remember to wear a protective mask and, above all, to work in a sufficiently ventilated room.
In all cases
Whether it is a solvent-based or water-based varnish, all can be dyed. You can do it:
with universal dyes,
with powder pigments,
with acrylic paints of the fine arts type for acrylic varnishes.
1. Prepare the wood to be varnished
Wood varnishes allow 3 kinds of finish:
glossy,
satin,
matte.
But before proceeding to the actual finishing, several preparation steps are necessary.
Strip
If your wood is already painted, stained, or varnished, it is necessary to strip it to expose the wood.
Sand
If your furniture is raw, a simple sanding is enough to give it back its original aspect. Use a fine grain (180-200) to sand by hand or with a sander.
Clean the wood
In all cases, vacuum the dust left by sanding.
Then wipe the wood with a damp cloth to remove all residues.
Let dry as long as necessary.
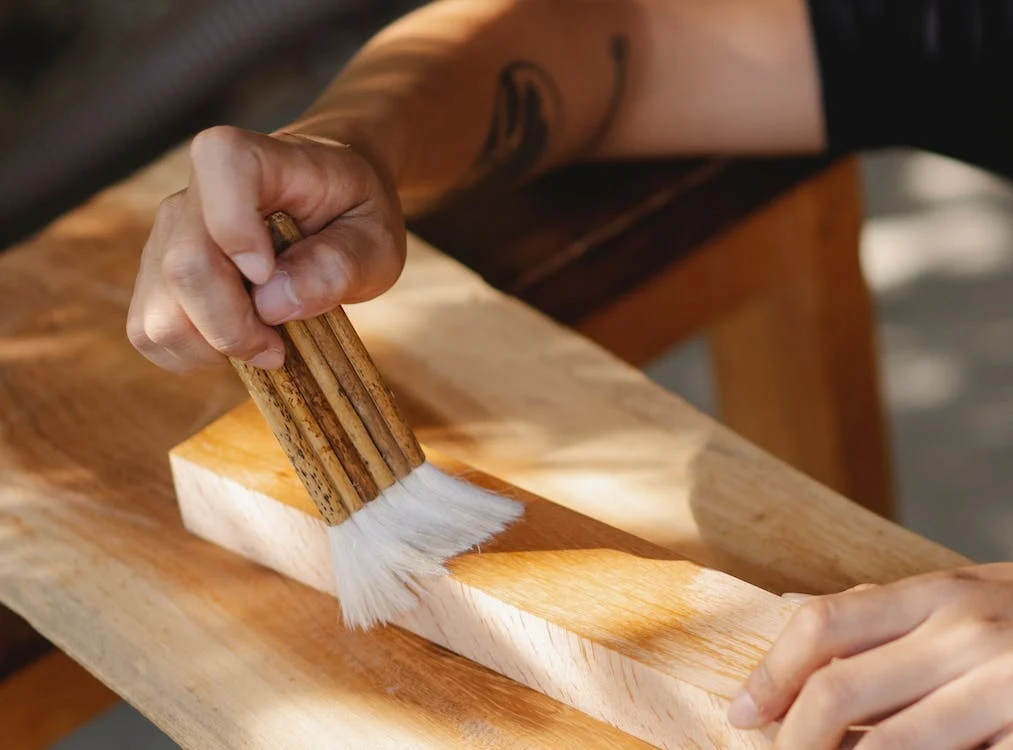
2. Apply the first coat of wood varnish

Once the surface of your wood piece is smooth and clean, you can apply the first coat of varnish:
Dip your brush into the jar, ensuring the bristles are not too full of varnish.
Run the brush in the direction of the wood grain.
Tip: You can also use a clean cloth rolled into a pad to apply this first coat of varnish.
Let it dry for at least 12 hours.
When the varnish is dry, lightly sand the surface with a fine grain (180-200) in the direction of the wood grain.
Important: make sure to follow the direction of the wood grain to bring up the fibers; this helps the adhesion of the subsequent coats.
Then use a damp sponge to remove the sanding residue and let it dry.
Tip: You can use a chamois to dry the wood faster.
3. Apply the successive coats of varnish
After this first coat, 2 to 3 more coats of varnish are necessary depending on the desired look, knowing that the more coats you apply, the brighter and more resistant the wood will be.
Apply a second coat of varnish as before, respecting the direction of the wood grain.
Let it dry completely (12 hours).
Then sand, without insisting too much, with very fine sandpaper (240 grain).
Apply the last coat of varnish perpendicular to the grain of the wood.
Then smooth in the direction of the wood grain.
Important: depending on the type of varnish used and the drying time, you may need to do this last step quite quickly.
4. Maintain your varnished wood
Over time, varnishes lose their shine or become damaged. Regular maintenance and care will help keep them in good condition.
On a daily basis
Simple gestures can preserve varnishes.
Clean them with a sponge soaked in mild detergent.
Important: Scouring pads and aggressive products are not recommended to clean varnished furniture.
Be careful not to place hot items (e.g., pots and pans) on it, as this may cause a white film to appear.
If it is an acrylic varnish, avoid shocks at the risk of making it jump.
In case of damaged varnish
Simple maintenance can be insufficient when the varnish is damaged.
If the varnish does not flake, sand the surface and apply a new layer of varnish.
If it does, strip it completely and re-varnish the surface.
Equipment needed to varnish wood
Vacuum cleaner
Cloth
Protective mask
Sanding paper
Sanding paper for sander
Chamois leather
Wide brush
Flat brush
Sander
White spirit