


Contents
– Step 1: Choose the lampshade frame
– Step 2: Prepare the paper
– Step 3: Apply the paper to the frame
– Step 4: Lay the sisal to form the lampshade
– Step 5: Apply the paint
Recycling is becoming more and more important in our daily life; on the one hand, it saves money, and on the other hand, it allows us to express our creativity.
This practical sheet explains the technique to make a very contemporary lampshade from a recycled lampshade carcass. All you need is some newspaper, sisal, glue, and paint, and it’s straightforward to make.
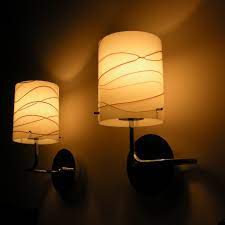
1. Choose the lampshade frame
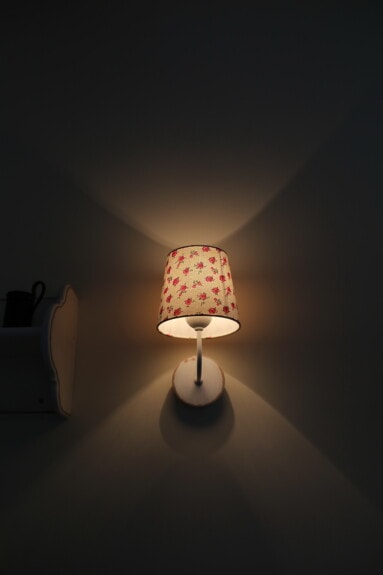
Choose a wide, rounded lampshade to diffuse a maximum of light.
Indeed, the chosen finish does not let the light pass through the lampshade but directs it towards the ceiling or the floor.
The choice of colors depends on your taste, but it is good to use a dark color for the outside, here a metal effect. For the inside, use a sparkling color to reflect the light.
The atmosphere will be soft and muffled, both sober and luxurious, ideal for a living room, a hallway, a landing …
2. Prepare the paper
You can use newspaper or “rag” paper. In the first case, make three layers of paper. In the second case, a single layer is enough.
– Cut strips of paper about 10 cm wide and longer than the height of the ribs of the lampshade.
– Use a knife for the rag paper and cut the newspaper by hand.
Tip: Prepare enough paper strips so you don’t have to interrupt your work too often.
– Prepare your wallpaper paste according to the manufacturer’s recommendations or use white glue.
Good to know: the white glue reduces the working time and makes the drying more stable. The paper shrinks less as it dries because there is less water in the base preparation. To use the white glue, add a little water, very little.
3. Apply the paper to the carcass
Provide a layer of newspaper on which to glue the paper strips.
Each time you glue a series of paper strips, remove a sheet of newspaper to keep the surface clean.
Glue the paper strips
– Place several sheets of newspaper on your work surface to protect it.
– Place your paper strips on the layer of newspaper, put on a pair of gloves, apply glue with a flat brush and glue the strips all over the surface.
Layout the paper strips on the lampshade
– Place your paper on the ribs of the lampshade (start from the top if it’s a round shape).
– Cover the entire shade by overlapping each strip of paper by a few millimeters.
– Every four or five strips, run glue over the surface to ensure that the paper is well bonded.
Note: if you are using newspaper, do the three layers in a row.
– Finish by applying a layer of glue to the entire surface, starting on the outside and working your way in.
– Let the paper dry ideally:
◦ Overnight for a lampshade covered with a layer of rag paper.
◦ 48 hours for a lampshade covered with multiple layers of newspaper.
Good to know: if you worked with wallpaper paste, imperatively apply a thin layer of slightly diluted white glue after drying. This layer of glue insulates the background.
4. Lay the sisal to form the lampshade
Sisal is a natural fiber that offers a beautiful decorative effect.
– Cut strips of sisal a little longer than the paper strips.
– Glue, with white glue very little diluted, a part of the outside of your lampshade, and place your sisal on it, letting it protrude at the top and bottom of the frame.
– Put a layer of glue on the sisal and continue to put it on the whole carcass.
– Finish with a layer of glue on the whole to agglomerate the fibers.
Tip: Before drying, work your sisal into an irregular, sparse shape.
– Let it dry overnight and cut off any excess threads at the top and bottom and those that have not adhered to the surface.
More deco: don’t try to fill in all the gaps! It doesn’t matter if there are empty spaces, as long as the work is harmonious and aesthetic. It’s cleaner if there’s no excess thickness.
5. Apply the paint
– Keep children and pets away. Work outdoors or in a well-ventilated room with a mask and gloves. Protect your surroundings.
– Preferably use fine art acrylic paints or small cans of matte acrylic.
– Stir your paint can perfectly, follow the instructions on the package. Then spend:
◦ Inside: one coat of red paint, two coats of dark gold paint.
◦ On the outside: two thick coats of black paint and a “domed” silver coat.
– Bomb evenly, without overloading.
– Let the paint dry perfectly and mount your shade on a lampstand.
Materials needed to make a lampshade.
| Spray paint |
| Recycled cloth |
| Paper scissors |
| Wallpaper paste |
| Knife |
| Mask and protective gloves |
| Newspaper |
| Acrylic paint |
| Flat brush |
| Container |
| Tea saucers |