


For this Mother’s Day, I wanted to gift my mother something that she holds dear and something she would use a lot during with – a scarf. So, I learned knitting and it was really hard to get the hold of it in the beginning. I wanted to give up so many times, but I did not as I know it would have made me sadder than not being able to gift this scarf to the most important person in my life. Well, I gradually learned how to knit, and I decided to share my experience here!
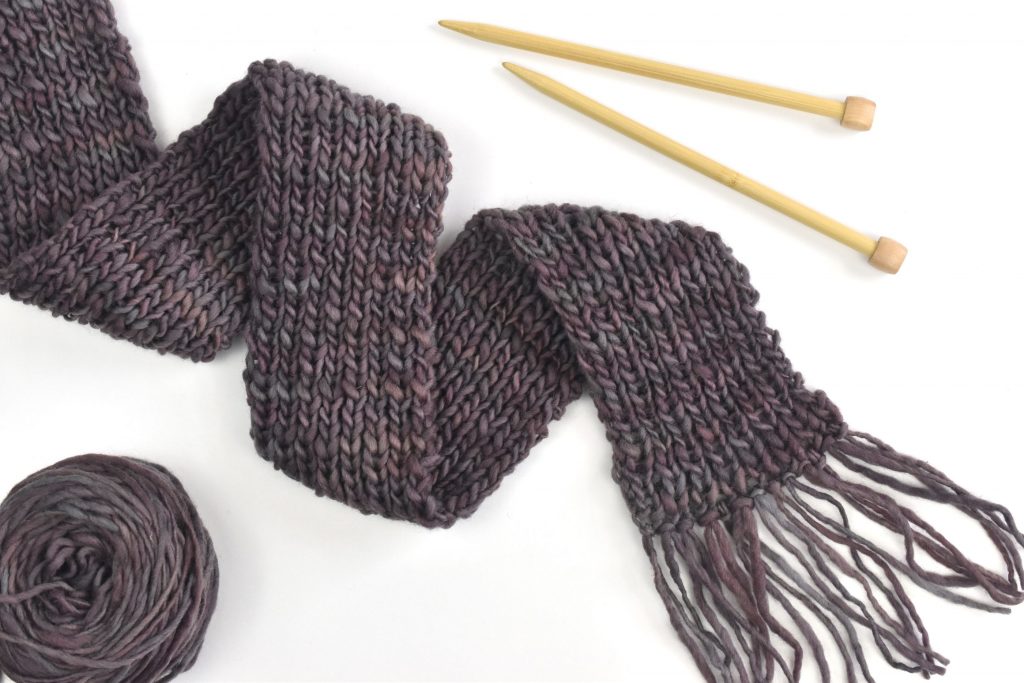
Knitting is one of those “do-it-yourself” (DIY) hobbies that give you the satisfaction of creating something aesthetically and functionally beautiful without any extraordinary efforts. Here, we have three simple steps on how to knit a scarf. Knitting a scarf is easy for starters, and helps you practice knitting.
Required Raw Material.
o Yarn. Take 6oz. of smooth and bulky yarn, for knitting a scarf of approximately 6½ by 60 inches.
o A pair of straight knitting needle. Knitting needles are available in a wide selection of materials such as metal, plastic, and bamboo. Choose a size as per your comfort.
o Scissors
o Yarn needle
The Three Simple Steps on How to Knit a Scarf.
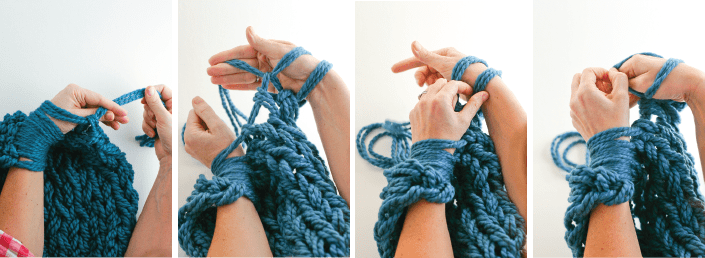
o Cast on. You start knitting a scarf by creating a row of initial loops on one of the knitting needles.
Create a slipknot, place the loop in one of your knitting needles, and hold the needle in your right hand.
Now, make a single loop of yarn around your left thumb.
Slide the needle under the loop then, with the right hand’s index finger bring the yarn over the point of the needle and place it over the loop.
Next, release the loop in the thumb by slipping it over the point of the needle and pull the yarn gently.
Similarly, make another 11 slipknots, so that we have a total of 12 knots on the needle. The width of the scarf depends on the number of slipknots casted.
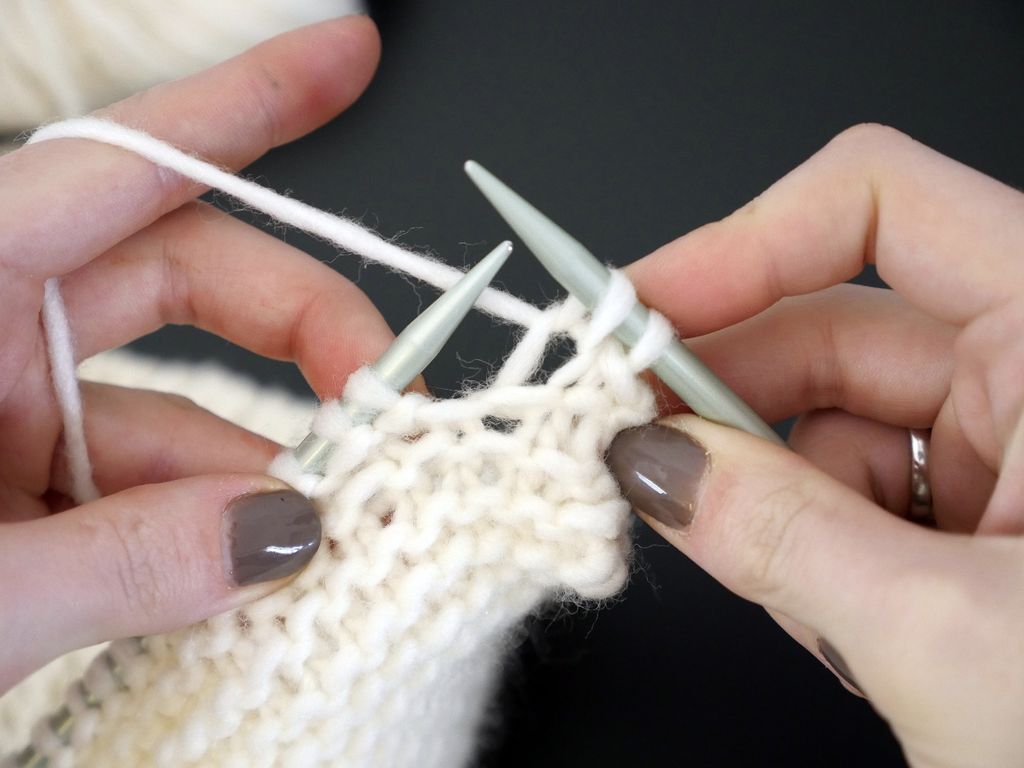
o the knit stitch. This is one of the basic knitting stitches.
Hold the needle with the slipknots in your left hand.
Insert the point of the right needle into the first stitch from front to back underneath the left needle.
With your right index finger, bring yarn from under and over the point of the right needle.
Pull the yarn on the right needle through the stitch on the left needle.
Pull back and place the right needle over the left needle. Now, pull off the loop over the left needle onto the right needle, thereby completing one knit stitch.
Continue steps (b) through (e) for the remaining 11 slipknots and keep interchanging sides so that the needle with the stitch is in your left hand and the empty needle in your right.
o Binding off. This is the last stage of knitting.
Knit the first two stitches. With the left needle, slip the first stitch over the second on the right needle. You will be left with one stitch in the right needle. Now, one stitch is bound.
Knit one more stitch and repeat by inserting the left needle into the first stitch on right needle and pulling it over the new stitch.
Repeat step (b) until you are left with only one stitch. Now, cut the yarn, leaving a 7″ end.
Thread the eye of the yarn needle with this yarn end and weave neatly into the bound stitches.
So, finally on Mother’s Day I gifted her the scarf and she loved it so much that she teared up and wiped the tears with the scarf! It was hilarious but so worth it! Do share your knitting experience with me and pictures of your scarves.