

Contents
– Step 1: Taking the right measurements
– Step 2: Prepare and clean the windows
– Step 3: Cut the film
– Step 4: Place the film upside down on the glass.
– Step 5: Lay the film down permanently
– Step 6: Cut the film to size
The safety film on a window allows the glazing to resist impacts and prevent glass splinters. There are different types: fire-resistant, burglar-resistant, explosive-proof. You will find a wide choice in many specialist shops.
The installation of a security film must be precise and careful because once installed; it is difficult to modify any imperfections.
Here are the materials and steps necessary to install a safety film on a window.
Materials |
Prices |
| Measuring tape | Starting at $4 |
| Sprayer | Starting at $2 |
| Window scraper | $2 approx. |
| Dishwashing liquid | Approximately $2 |
| Paper towels | $1 |
| Rag | Old cloth |
| Aluminum ruler 2 m | Approximately $15 |
| Cutter | $3 approx. |
| Scraper | $10 approx. |
Good to know: for all safety films, the installation principle is the same.
1. Take the following measures
It is necessary to measure precisely the size of the window on which the film will be applied. The height and length dimensions of the window are essential to choosing the film dimensions. Using the measuring tape:
– Carefully measure the height of the window in centimetres.
– Measure the width of the windowpane in centimetres.
2. Preparing and cleaning the windows
Proper preparation of the glazing allows you to ensure a quality installation:
– Spray the glass with soapy water using a sprayer.
– Carefully clean the glass with a unique glass scraper.
– Once your window has been thoroughly cleaned, wipe the entire pane, including the frame, with paper towels or a lint-free cloth. The whole unit must be completely dry.
3. Cut the film
Start by cutting out the film. The film cut must be precise and adapted to the size of the glazing:
– Transfer the measurements taken in step 1 to the safety film, to which you will have added 3 cm.
– Cut the film using a cutter and ruler.
4. Lay the film upside down on the windowpane
– Spray soapy water on the glass. Don’t hesitate to be generous; the soapy water helps keep the film in place before installation.
– Place the film upside down on the wet window with the adhesive side facing you.
– Peel the protective film from the sticky side.
– As you do so, spray soapy water on the exposed adhesive side.
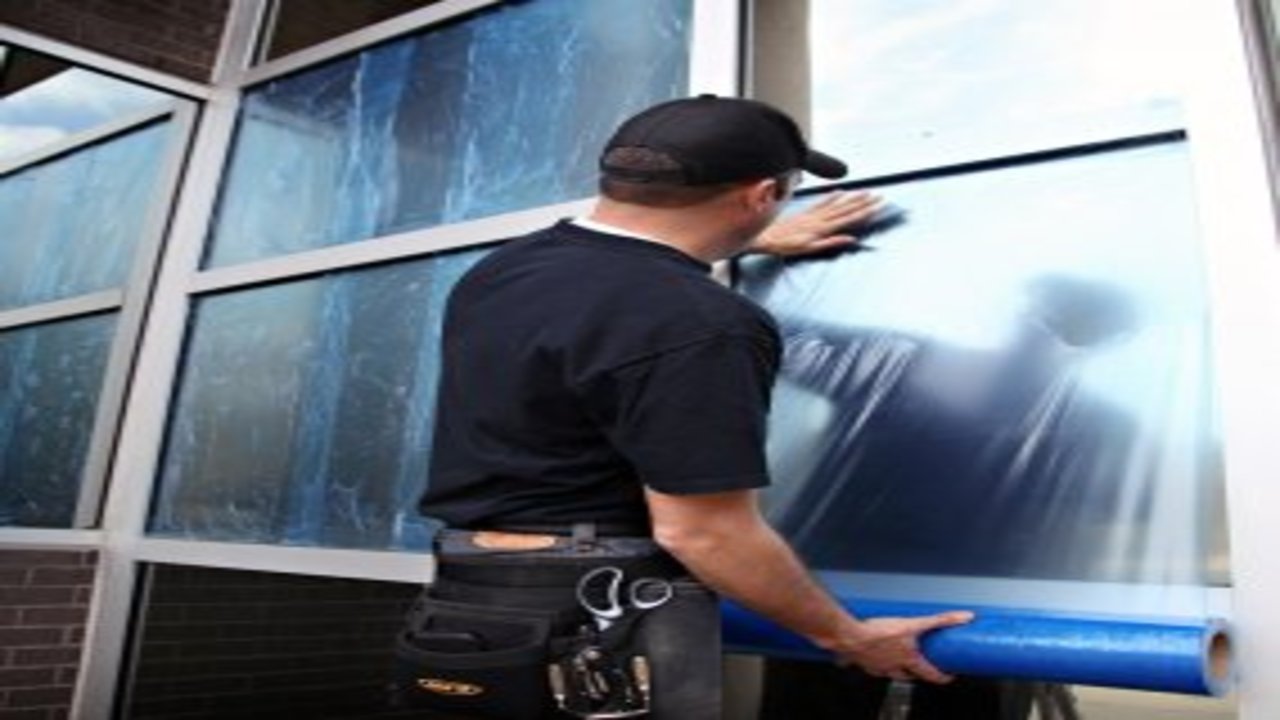
5. Apply the film definitively

– Turn over and apply the film on the adhesive side to the glazing.
– Take the time to position it correctly by sliding it over the wet window: the film must be centred so that the edges protrude slightly from the glass.
– Spray soapy water on the film positioned in this way: this will make it easier to squeegee the film.
– Using the squeegee or a plastic scraper, roll the safety film from the centre outwards by starting from the top, to expel the soapy water and air bubbles. Hold the film in your other hand to prevent it from moving when the scraper passes over it.
– Roll the film until the air bubbles have entirely disappeared.
Cut the film to the right size
– Cut the film with the ruler and cutter, leaving a margin of 2 mm between the glass and the frame.
– If you still detect air bubbles, press them out one last time: once dry, it will be impossible to remove them!
– Wipe off the remaining soapy water with paper towels or a lint-free cloth.
Your safety film is applied!
Note: If you are looking for professional installers in Ottawa, you can get in touch with Vision Window Tint Etc. They are experts with hands-on experience since 2000 and will get the job done in the most professional manner for you.
Hope this post helps you out, and remember to leave your comment in the section below.
One thought on “How to Apply Security Film on a Window”