

How to Sew a Button
Have you ever had a button fall off your jacket or shirt and wondered how to sew it back on? Don’t worry, it’s easier than you think! In just a few simple steps, you’ll learn how to hand-sew a button and repair or personalize your garments. Whether your fabric is thin or thick, this technique will help you sew buttons like a pro.
custom baseball jerseys
football jerseys
Nike Air Max 270 white
nike air max womens
Jerseys for Sale
nike air jordan sneakers
nike air jordan shoes
nike air jordan 1
best couples sex toys
adidas promo code
nike air max for sale
custom football jerseys
custom hockey uniforms
nike air max shoes
nike air jordan 4 retro
nike air max for sale
Step 1: Prepare the Thread
Gather your materials:
- Make sure the new button is the right size by passing it through the buttonhole.
- Choose a thread that matches the color of the other buttons. Polyester thread works well for all types of sewing.
- Get a needle, needle threader, and scissors ready.
Prepare the thread:
- Use the needle threader to pass the thread through the eye of the needle.
- Double the thread and cut it, leaving around 70 centimeters in length.
- Tie a knot at the end, taking both threads together. Now you’re all set!
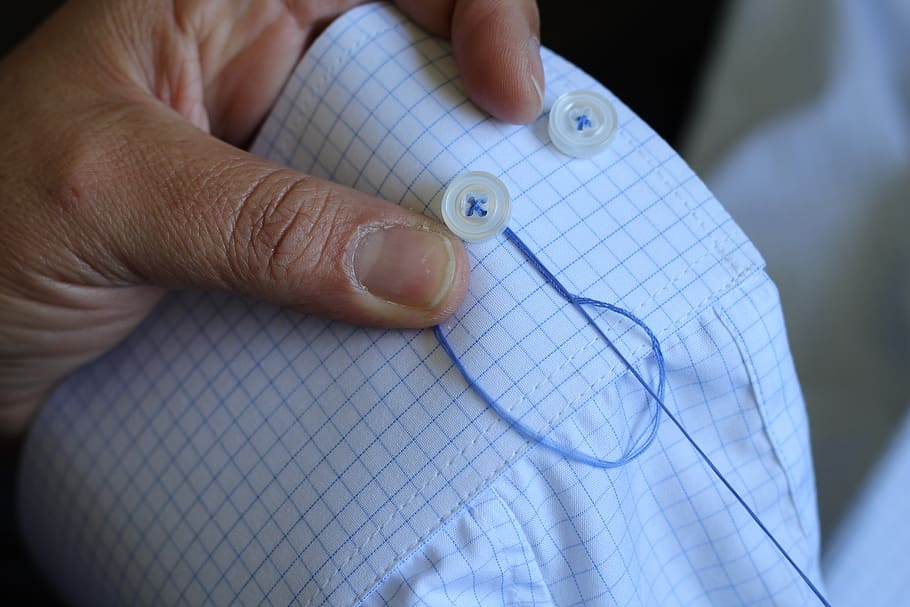
Step 2: Start Sewing
Find the spot where you need to sew your button:
- Look for the small holes from the previous button or measure the space between other buttons.
- Align the button and the corresponding buttonhole to guide you.
Start sewing:
- Stitch the needle from the right side of the fabric (the outside of your garment) and pass it through the fabric.
- Use a thimble to push the needle through and stop at the knot.
- Position the button, hiding the knot, and thread the needle through the fabric again, this time from the inside out.
- Pull the thread through.
Step 3: Attach the Button
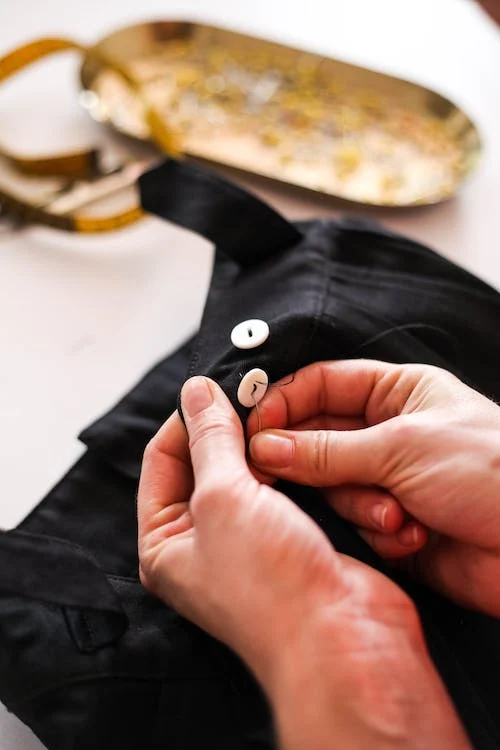
Case 1: Thin Fabric
If you’re sewing a flat button onto thin fabric like a shirt:
- Pass the thread through one buttonhole and stitch through the hole next to it.
- Repeat until the button is secure.
Case 2: Thick Fabric
For thick fabric, you’ll need to create a rod between the button and the fabric:
- Take a match and place it between the buttonholes.
- Stitch through the hole next to it, passing the thread over the match.
- Continue stitching, passing the thread over the match, until it’s secure.
- Remove the match and pass the needle through a hole without stitching through the fabric, creating a gap.
- Wrap the thread tightly around your stitches to form a stem under the button.
Attaching a Ring Button
Sewing a ring button is similar to sewing a button on thin fabric:
- Position the ring where you want it and pass the needle through the ring.
- Stitch into the fabric just next to the first stitch.
- Repeat several times for security.
Step 4: Finalize Your Seam
Secure your stitches and make a knot:
- Stitch inside your garment to make a knot, tightening it well.
- Cut the thread flush with the scissors.
Now you know how to sew a button like a pro! With a few simple steps, you can repair and personalize your garments. So next time a button falls off, don’t worry, you’ve got the skills to fix it. Happy sewing!
Materials Needed:
- Sewing needle
- Matches
- Sewing scissors
- Sewing thread
Sewing buttons is not only a practical skill but also a creative one. You can mix and match buttons to add a unique touch to your clothes. Try sewing colorful buttons on a plain shirt or using shiny buttons for a touch of glamour. If you want to get even more creative, you can experiment with different stitching patterns or even add beads or embroidery thread to your buttons. Don’t be afraid to let your imagination run wild and have fun with your sewing projects. Remember, with practice, you’ll become a button-sewing expert in no time!